Sunday 28 January 2018

German Cookies-Dog Shaped

Dog Shaped Cookies-The year Of The Dog-2018


Cutie Cutie doggies


I double the recipe and shaped in the form of dogs since it's the year of the dog.I saw pictures of this cute lovely doggies posted on facebook and also seen the cookies being sold by some cookies seller.At first,I weren't thinking of making because it's going to be a tedious job.That was until I went to buy some baking needs that the cashier recommended me.She thought that I was going to make some dog cookies when she saw my koko crunch
and chocolate chips on the counter.My daughter had wanted to buy the koko crunch home to eat.The cashier kept telling me that the koko crunch was way too big for making the dog's ears.Feeling blur,she show me a card with dogs pictures and recipe on it.Finally,I understood what she meant.Though I have seen people posted on facebook,I weren't too keen in knowing what they uses to make the nose,eyes and ears.This cashier made me feel interested.Why not since I have the koko crunch and chocolate chips,I can just add in two more things,that is the love for the tongue and chocolate rice for the eyes.You can do without the tongue.It's optional.On the cashier's advised,I changed the koko crunch into smaller one.My daughter won't be eating that much.The rest would be for me to make dogs 
cookies.Feeling excited I went home to bake.


At first I made this types, then  I changed to bigger ears because I see it more cutier and lovelier.


This is also my first time baking with potato starch.


This german cookies are very soft.


Ingredients:

250g unsalted butter(I prefer salted,so I used)

80g icing sugar

2 tbsps vanilla

250g potato starch

160g plain flour/all purpose flour

Methods:

1. In a mixing bowl,use electric mixer to beat butter and icing sugar till creamy.Add in vanilla
and continue beating till well combined.

2.Add in sifted potato starch and plain flour with a spatula to form a soft dough.

3.Make small balls and tiny balls for the nose attachments.Then attach the koko crunch as 
ears,the chocolate chips as nose,the love as the tongue,and chocolate chips as the eyes.

4.After all done,bake in oven 150°C,fan forced with top and bottom heat.Bake for 15-20 minutes,but your oven temperature may varies.(know your own oven).


5.Let the cookies to cool on the baking tray first to prevent breakage before transferring to wire rack to further cool.

Wednesday 24 January 2018

Love Pineapple Tarts

With love from Pineapple tarts 2018


Chinese New Year is round the corner.Every year I made pineapple tarts.This year I sealed my pineapple tarts with love.


This recipe below is just great for making the roll and closed pineapple tarts.

It's just a random recipe for every year from:https://cocomintt.blogspot.my/2014/01/pineapple-tarts-for-chinese-new-year.html

226 grams butter

3 tbsp sugar


11/2 tsp salt


1 egg yolk


21/2 cups flour(330g)


2 tbsp milk powder


2 tbsp corn flour


21/2 tsp custard powder 


1 tsp vanilla essence


Method:

Beat butter with sugar until fluffy.Then add in egg yolk.Mix the flour,corn flour,custard flour,milk powder and salt together.Then add to the butter mixture.Add in the vanilla essence and beat again evenly. Make into dough and roll,then shape with cutter.Fill the pineapple jam.Bake in a preheated oven,180°C until cooked.


With love from pineapple tarts 2018


Saturday 20 January 2018

Chocolate-Filled Buns

This is my simply chocolate-filled buns.Recipe is the same as the Braided Bread-https://cocomintt.blogspot.my/2017/08/braided-bread.html

by http://mymindpatch.blogspot.my/2015/03/sugar-twister-bread.html

I only stuff the chocolate fillings in from store bought and turned into a flower buns.I was  craving for chocolate buns at that time and hence decided to make a quick one with this recipe.


I have sprinkle too much seasame seeds.Pardon me,I have too much sesame seeds left.It should be put in the middle but as you can see I've put it everywhere.


Use a knife or scissor to cut into petals.


Friday 5 January 2018

My Uber Experiences

Previously,I talk about grabcar experiences.Now I'm going to talk about uber experiences.

Going back to Kuala Lumpur,I uses Uber a lot instead of grabcar.The reason why I changed to Uber is because Uber have got a lot of promotions and promo code for me.Using the promo code,I can have discounts or even sometimes free ride depending on my distance.The month was November and in 2017.I used grabcar too but not so often compared to my previous visit to Kuala Lumpur.
Wherever and whichever is cheaper,I used.Easy say!
Some of the Uber drivers are very good and friendly,but a few not so.The good and friendly one will
ask you whether the aircon is cold enough for us and have a friendly chat with you all along and the unfriendly and lazy one will just keep driving and complain that you didn't show the exact direction that you going to,and there was a man who dropped me and my family a farther distant away from the shopping mall that we had to walk under the hot sun till we reach the front shopping mall.This guy I gave him only one star.Most drivers I gave four to five stars.
Malaysia is a very hot country,but most uber and grabcars aircon are not on strong enough.They only turned on to 2 the maximum.
I noticed that there are many women drivers.Sometimes in one day I can have three women drivers.
Considering how arkward I was sitting with strangers,women drivers just suit me.
One night,there was a lady driver who call first to ask where I was going.Why does she ask when it's already written  the destination on the uber app?Anyway,this driver call to confirm where I was heading to.She thought I wanted to go to the airport.I told her it wasn't airport and she ask me to cancel my booking which I didn't.I wouldn't want uber to charge me which is not my fault.In the end she cancel it herself.A few minutes later,I got a message from uber charging me RM5.I then submit ticket to complain to uber.Then uber drop the charges which is fair.

Uber on the other hands,compare to grabcar don't charge toll fees.It's all included.so,it's fix price.Grabcar charges you toll fees which is not included yet.We already know how much uber charges us while we were sitted inside the car,but we don't know how much grabcar is going to charge us until we arrived at our destinations.Once the car stop,you ask them how much and you waited till they count and tell you how much.So,will you use uber or grabcar?It all depends on you.


Thursday 4 January 2018

Crispy Banana Fritters

Pisang Goreng 


Last night,I made some crispy banana fritters.I bought two bananas but only one is ripe.

I've made and blog before my pisang goreng or banana fritters.


This time I want no eggs,butter or milk added but something more plain and adding some custard powder is what I like so that my banana fritters will have a nice yellow colour.At first,I wanted to add in coconut cream but then I decided not to because I have already decided to make it plain but crispy.

I used pisang rajah-the longer and bigger type of bananas for making fritters.The riper the better it is to me in making fritters.You can also use any other types of cooking bananas that you know of.

Ingredients:

about 422g of ripe pisang rajah

100g rice flour

1 tbsp custard powder

11/2 tsp baking powder

1/2 tsp sugar(optional)

1/2 tsp salt

100ml water

1 tbsp oil(or margarine)

Method:

Mix together rice flour,custard powder,baking powder and salt(sugar if sugar is use) together in a bowl.

Add oil and water in to mix.Mix thoroughly and smoothly with a spatula.

Cut the banana diagonally into pieces.

In a cooking pot,heat up oil.

Dip the banana pieces into the batter.When the oil has got smoke,deep-fried the banana.

When it turns golden,take the fritters out dripping any excess oil on an absorbent papers or put on the cooling rack with a tray underneath to collect the oil.

Serve warm.Makes 16  thin pieces.8 for thick pieces. 


Monday 18 December 2017

My Nikon D5300 Camera Was Stolen

Today,I got very very sad, angry,disappointed and heartbroken.My Nikon DSLR5300 was taken and stolen away from inside my car.I guess it was my stupid mistake for not locking the car and not taking the camera with me.The same goes to my daughter who is with me to the nearest supermarket to buy something.It was my fault and therefore I got very very annoyed and very very frustrated.

A year ago,I had bought this camera for the family to use and partly for my two sons to use in the school when they needed to shoot videos for their projects.Cameras are very costly but I have to buy,else they don't have camera to use.

Now,my Nikon D5300 camera is gone.How sad and furious I am.It will probadly took years for me to buy another good camera.Don't dare to buy another one.


Please do not be like me to leave your precious belongings behind in the car.There are some nasty thieves around.You can never take it back or can you?


Or shall I buy again?


Wednesday 13 December 2017

Flower Buns


Dough:


21/2 cups all purpose flour

3 tbsps. granulated sugar

1/2 tsp fine salt

1 tbsp. dry yeast

3/4 cup warm milk

1 large egg,beaten

3 tbsp. butter at room temperature

Extra flour as needed

Some cut spring onions for garnishing


Make the dough :

1. In a mixing bowl put flour, make 3 wells. Add into each well : sugar, salt, yeast. Stir sugar and yeast first then stir together using a wooden spoon.
2. Pour warm milk and beaten egg (minus 2 tbsp). Stir until combined.
3. Add soft butter, continue stirring until well blended into a smooth sticky dough.
4. Put the dough into greased bowl. Cover with cling wrap and put in warm place for about an hour.
An hour later the dough will be very soft and hollow. When you pull the dough, it will show the hollows all around.
Sprinkle with extra flour  and start folding with finger tips (not kneading). Sprinkle more flour as needed but not too much.
5. Dust work table with flour before put the dough. Flatten the dough with hand. Cut into 16 pieces.
6. Shape the dough into balls. Sprinkle with flour to prevent sticking.
7. Flatten or press the dough with fingers, brush with butter. Put on  some green onions on top.Fold into a half-moon,brush with butter again, then gather both corners creating a flower petal.
Repeat the method until finished.
8. Arrange on a greased round pie baking pan. Cover with loose cling wrap for 30 minutes. Let rise.
9. Brush beaten egg on top.
Bake at 175°C pre-heated oven, for 30 minutes until golden brown and blooming.
Let stay in the pan for 10 minutes. Serve with hot soup .


Saturday 16 September 2017

Meat Horns

Yesterday I made this pastry horns stuffed with cheese and tuna and the other stuffed with curry chicken meat.


Cheese and Tuna


Curry Chicken Meat


Empty horns


This recipe was copied from someone a very very long time ago.By the look of the picture and the recipe,I would like to make,but I can never find the patty horn mould until last week I saw at the DIY bakery equipment shop while I was buying some ingredients for making mooncakes.
20 plus years that I had kept this recipe.It was such a very long time ago.Now we had it on the internet.

Ingredients for the pastry:makes 12


225 grams margarine


350 grams plain flour + pinch of baking powder sieved together


2 eggs


Cream horn patty moulds


Method:

1.  Mix margarine with flour for 1 minute.Add in 1 egg and continue mixing.

2.  Add second egg and continue mixing till dough is lumpy.Set aside for 5 minutes.

3.  Roll out dough to 4mm thickness.Cut lengthwise into long strips about 11/2cm x 20cm.

4.  Wind each strip around horn mould to form horns.Rest for 5 minutes.

5.  Glaze horns with egg and bake at 425°F/220°C for 10-15 minutes.

6.  Fill corns with meat or desired fillings and serve hot.

For the curry chicken fillings:


150 grams chicken-cut bite-sized

1 small potatoes-cut into cubes 

1 small red onions-cut small

1 pip garlic-cut small

4 tbsps curry powder

1 tsp sugar

1/2 tsp salt or to taste

1 tbsp coconut milk or evaporated milk

1-2 tbsps cooking oil

Method of frying:

1.  Heat oil in wok and fry onions and garlics till brown.Add curry powder with 2 tbsps water and add the chicken and potatoes follow by sugar and salt.Add more water a bit and simmer till potatoes are soft and the meat is tender and cooked.

2.  Lastly,add in the coconut or evaporated milk and stir till the fillings are dry but not too dry.

3.  Dish it out.Fill the horns with meat.

For the tuna and cheese is just simple.At first I wanted to add chilly and mayonaise into the tuna but there was no mayonaise at home.This I made for my daughter to bring to school.


Saturday 2 September 2017

Pandan Ogura Cake

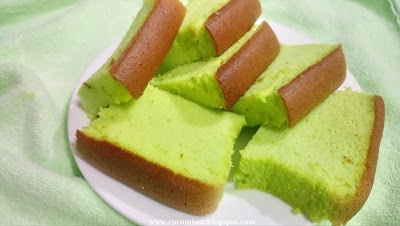
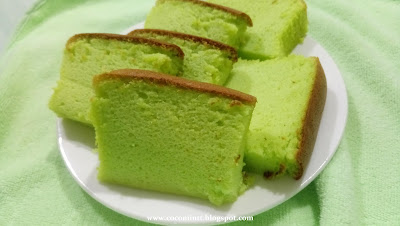
Pandan Ogura Cake(2))


This is my second time making pandan ogura cake but from a different recipe source and much bigger than the first one.


This was adapted from http://stephiews.blogspot.my/2017/04/pandan-recipe.htmlogura-cake-


The cake is as soft as can be.It tasted like pandan chiffon cake.This pandan ogura cake uses milk whereas the other recipe uses coconut milk.You can check it here:https://cocomintt.blogspot.my/search/?q=pandan+ogura+cake

Lined the cake tin with parchment paper.

Ingredients:

5 egg yolks + 1 whole egg

65g corn oil

95g fresh milk

1/4 tsp salt

70g cake flour(sifted)

2 tsp pandan juice

a pinch of green colouring


5 egg whites

70g sugar

Method:

1.  Beat egg yolks with a whisk.

2.  Add in corn oil,fresh milk and salt.Mix well.

3.  Add in sifted cake flour and pandan juice.Add in a pinch of green colouring.

4.  Beat egg whites to soft peak.

5.  Add in sugar gradually,begin with a small amount.Once foamy,continue to add in                    gradually as you beat.Beat till stiff peak formed.

6.  Take 1/3 white mixture to yolk mixture.Fold well. Then pour into the rest of the white               mixture. Fold well.

7.  Pour into the lined cake tin.(8").Use a spatula to smooth the surface.Bang it lightly to            release excess air.

8.  Use water-bath method to bake the cake in the oven at 150°C for 60 minutes or when          when a skewer inserted in the center comes out clean.

9.  Take the cake out of the oven and invert on a wire rack.Remove the paper and let to               cool.

10. Slice the cake or chilled in the refrigerator overnight for a better flavour.


Saturday 26 August 2017

Steamed Baked Castella Cake

Castella Cake


No cheese added


Like everyone else,I also wanted to make castella cake.It is the talkabout cake these days.The current craze of foodies where people lined up just to buy even though there was a long q.I started going out to buy after trying two times baking at home.If I don't I won't even know how the real taste is like.
Here I am baking for the third time,each time with a different recipes.First two are with honey and smaller recipe and third time without honey.The source? From Stephie's cooking but I altered a bit of the recipe and my cake turned out super super soft.More softer than the one I bought in the store.Next time,I will try to follow exactly her recipe.


Here, my cake is looking cottony soft than bakery bought.I ate my cake warm.Some of it I left in the fridge and ate cold the next day.Both warm and cold are very nice.

I only used my 8" square cake tin lined with parchment paper to bake my sponge cake.

Ingredients:

       (A)

75g  veg.oil

75g  bread flour

15g  cake flour

60g  milk

6     egg yolk

        (B)

6       egg white

1 g     salt (a pinch)

75g   caster sugar

Method:

1.  Heat oil in pan over fire for 2 mins or put in the microwave.

2.  Mix veg oil with bread and cake flour.

3,  Add in milk and egg yolk.Mix to a smooth batter.

4.  Beat egg white and salt with a mixer.

5.  Add sugar in batches slowly until stiff peak formed.

6.  Add 1/3 of B ingredients to A and mix well together.

7.  Then,A and B combined together.Mix well with a spatula scraping the sides down.

8.  Steam bake 160°C for 60 mins or toothpick inserted in the center comes out clean.

Before bake,bang the tin on the table 2-3 times to get rid of air trapped inside.


I cannot say I've succeeded professionally yet and I'm not sure if this really is called the real castella cake or just a soft cotton steambaked sponge cake.What is your opinion?Let me know.


COLOURFUL GERMAN COOKIES

I try making German cookies with different colours. This recipe is the same as I've used in dog German cookies. These are irresi...